How To Hit The Perfect Forehand Drive In Badminton (Step-By-Step Tutorial)
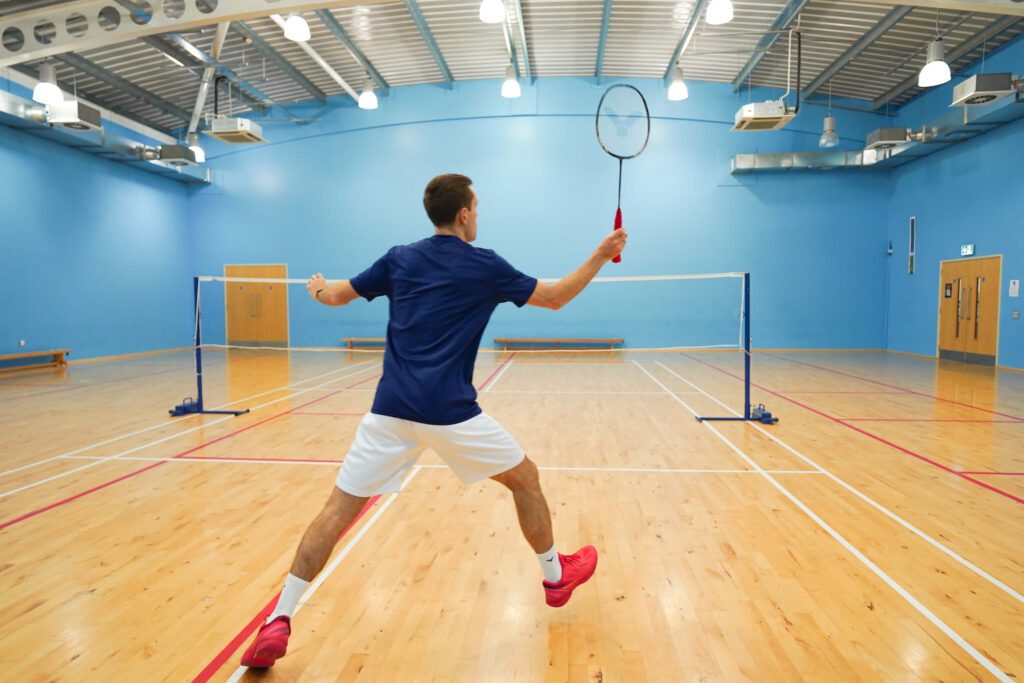
A forehand drive in badminton is an attacking shot that is played from the mid-court, and should pass close to the net with a flat trajectory. It is important to develop a forehand drive that is consistent, accurate and powerful.
To play a good forehand drive in badminton, you need to be in a loose forehand grip, shoulders and hips facing forwards, bring your elbow and wrist back, then accelerate your hand and elbow forwards. As you step into the shuttle, snap your wrist and squeeze your grip.
We’ll now go through everything you need to know about the forehand drive in badminton including:
- The preparation
- Hitting technique
- Footwork
- Placement
- Practices
- When NOT to play it!
But before we break down the technique, we need to answer one of the most common questions:
Should You Have A Big Swing When Playing The Forehand Drive?
There’s no simple answer to this, but here are a few points to consider:
- For beginners or kids it might not be possible to drive without a big swing as they don’t have the power or timing just yet.
- In certain situations, a big swing is actually more beneficial – like when you have lots of time, which we’ll come back to later.
- But, for most people, having a shorter swing will be more effective.
There are 3 main reasons why having a shorter swing is often better:
1) If you have a big backswing, you reach the shuttle later. This means you then have a later contact point with the shuttle. But with a short backswing, you meet the shuttle earlier, meaning you have more options of what shots you can play and you give your opponents less time to react.
2) A big swing often leads to a big follow through, so by shortening your swing you can reduce your follow through and be in a better position for the next shot – we call this a building shot.
3) If you develop a powerful drive with a short swing you can then easily make it more powerful by increasing the size of your swing. It’s a lot harder to do this the other way around!
For these 3 reasons, we’re going to focus on how to drive with a shorter swing, so let’s now break it down, step-by-step!
Step 1 - The Preparation
You need to be in a loose forehand grip and also need to be relaxed in your forearm and shoulder.
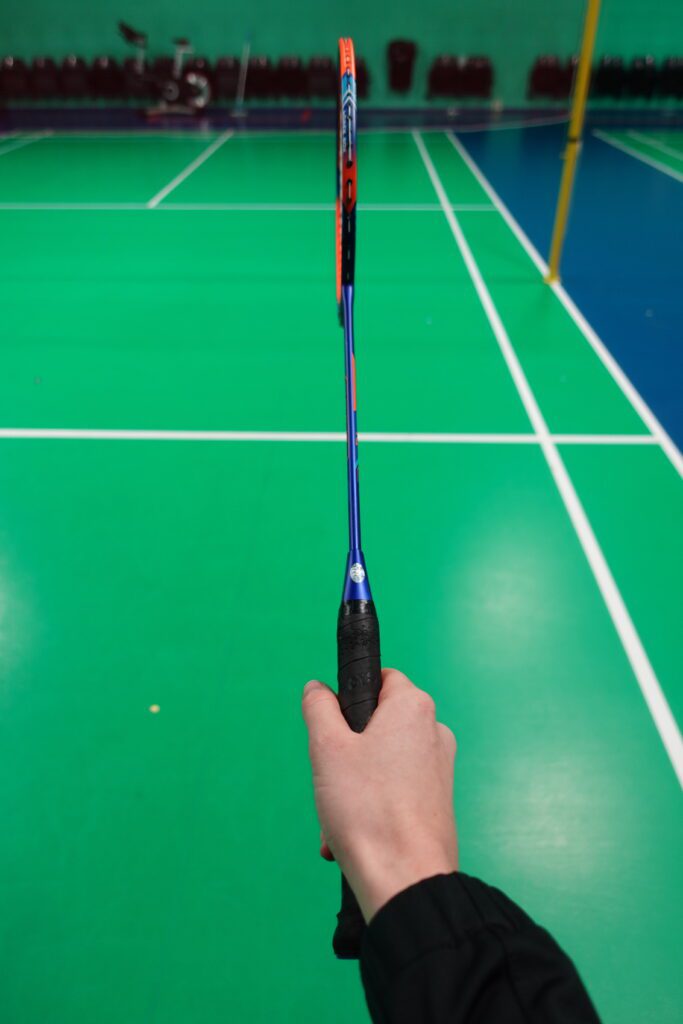
If you’re not relaxed, and you find it really difficult to create any power with a short swing, this might be why!
Also, if you’re really tense, then you will often use your entire arm to help create power – forcing you to use a bigger swing.
💡 You can also use a panhandle grip for the forehand drive and we’ll get onto when you’d chose to do this later on.
Step 2 - Hitting The Shot
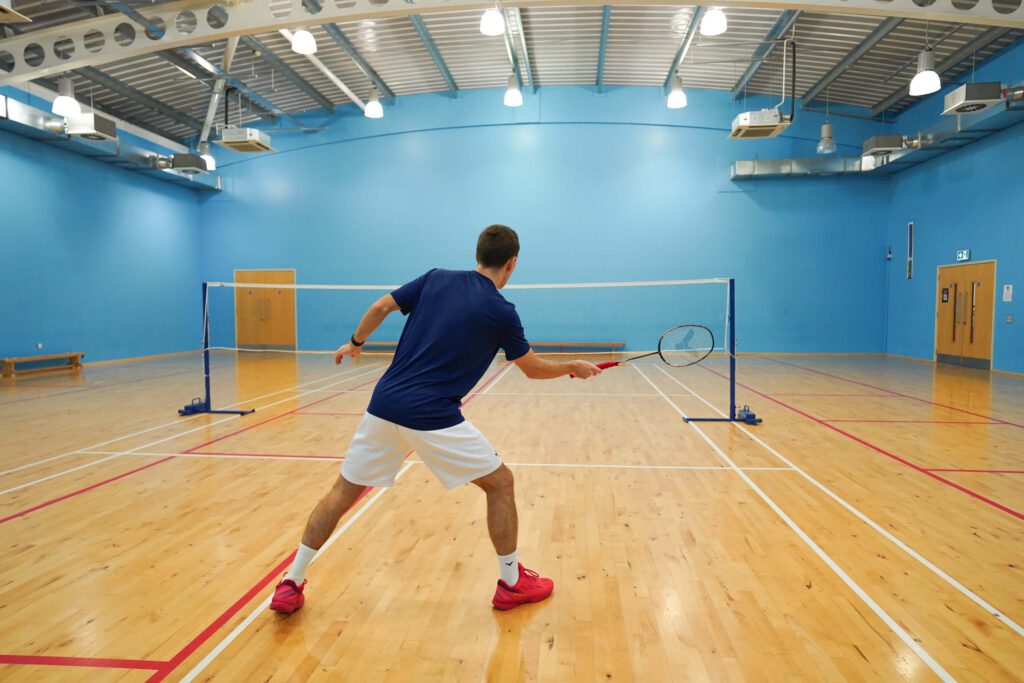
When the shuttle comes towards you, you should keep your shoulders and hips facing forwards and then as you step out to the side or step forwards, you should bring your elbow back a little bit whilst also slightly bending your wrist back.
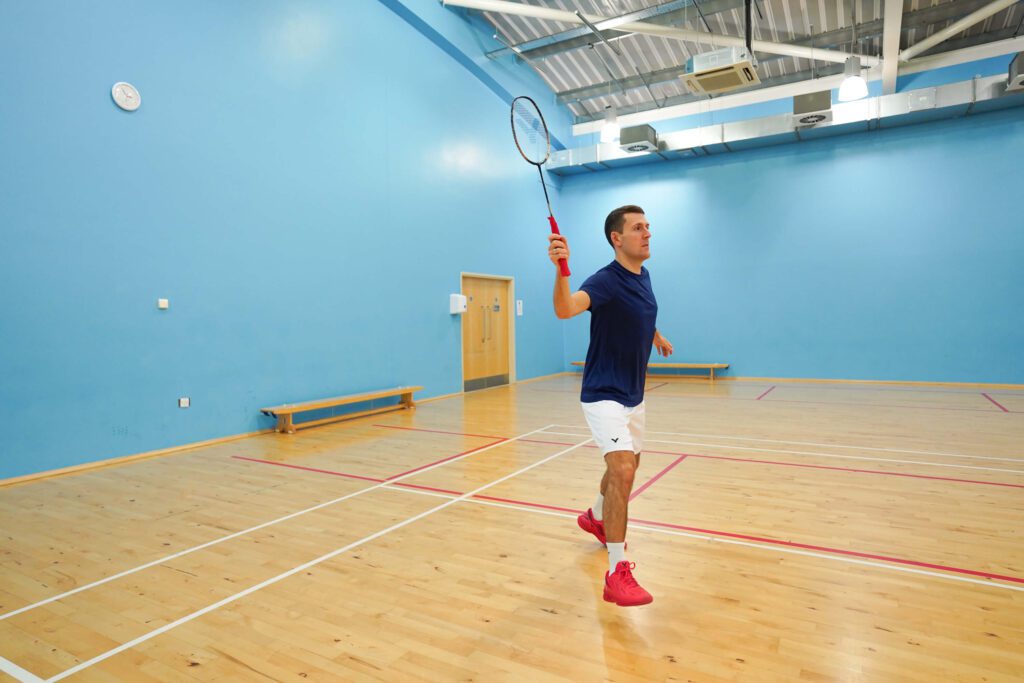
Bringing your elbow back allows you to have that short backswing to help create power.
But there will be times where you don’t have the time to bring your elbow back and instead you create the power with just the squeeze of the grip. This means you have a really short swing which is often not a winner, but can be used as a ‘building shot’ – this is when you apply pressure and hopefully set yourself (or your partner) up for a winning shot!
💡 If you don’t bend your wrist back then your racket will be facing down and sidewards… which is not where we want the shuttle to go!
Bending your wrist back also helps you hit the shuttle cleanly, and means you don’t slice your drive – which massively helps both your power and control!
Once you’re in this position… you then accelerate your elbow forwards, then bring your hand forwards and snap your wrist, and then finally squeeze your grip as you strike the shuttle. It’s important to mention that this is all done VERY quickly after each other!
Step 3 - Footwork
First, you need to do a split step and then step out or forwards. As your racket foot is about halfway through this step, you should now have completed step 1 and half of step 2. As a quick reminder your elbow should be back a little and your wrist also bent back.
You then bring your elbow and hand forwards, like we mentioned in step 2 and then you ideally want your racket foot to land literally milliseconds before you squeeze your grip and strike the shuttle.
This enables you to be in maximum control of your body and you can also use this extra force from your step to add more power into the drive.
Ideally you want to be stepping forwards INTO the shot, which can also intimidate your opponent, helping you to play effective softer shots. However, we know stepping forwards isn’t always possible and sometimes you might need to step out to the side and this is where the panhandle grip becomes useful!
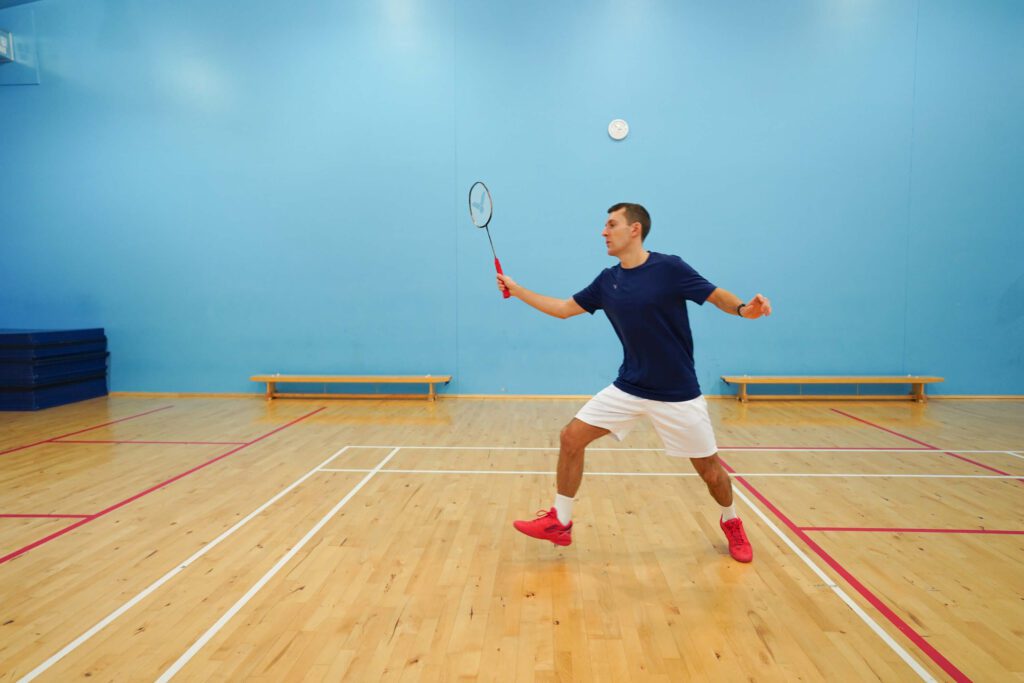
💡 Having your thumb on the side of the grip can improve the control of your shot from certain positions. Learn more about the panhandle grip here.
Step 4 - Placement & Decision Making
As we’ve said many times before, sometimes it’s better to hit a shot with 80-90% power and perfect placement, than 100% power but straight to your opponent’s racket!
Good places to hit the forehand drive are:
- Straight down the tramline
- To the middle – to surprise your opponent if you’re playing singles, or to create indecision or set up your partner in doubles
- Cross-court – usually only when you’re taking the shuttle above the height of the net as it could create a big gap on your side of the court if you don’t time it right.
💡 Hitting cross court gives your opponent more time to react and can get you into trouble if you don’t play it at the right time.
There are also other considerations when hitting a forehand drive:
- When the shuttle is very high above the net and you can try to win the rally – you should use a bigger swing to help you generate extra power.
- When the shuttle is around net height – if your opponent is in a good position then you might choose to play an 80% building drive to set yourself up for the next shot as we discussed earlier.
- You usually shouldn’t play a drive if you’re hitting the shuttle more than around 20cm below the net. It would be better to try and play a softer shot to make your opponents move, or to lift it and give you time to recover. But of course if there is a gap on the court to hit into then this still might be the right shot!
Step 5 - Practices
We’re now going to share 5 practices that every level of badminton player can do, to help you not only perfect the technique, but also get used to making the right decisions.
1) Hitting individual shuttles
This is a great practice to focus on the technique and timing of the shot. If you don’t have someone that can hit shuttles accurately at you then they can throw them from the side – it’s not as realistic but it’s acceptable for when you’re just developing the technique.
2) Driving back and forth with your partner for sets of around 90 seconds
You won’t be able to step into the shot as much here because it will come back quick, but because of this you’ll be able to work on generating power with a shorter swing.
3) Wall hitting
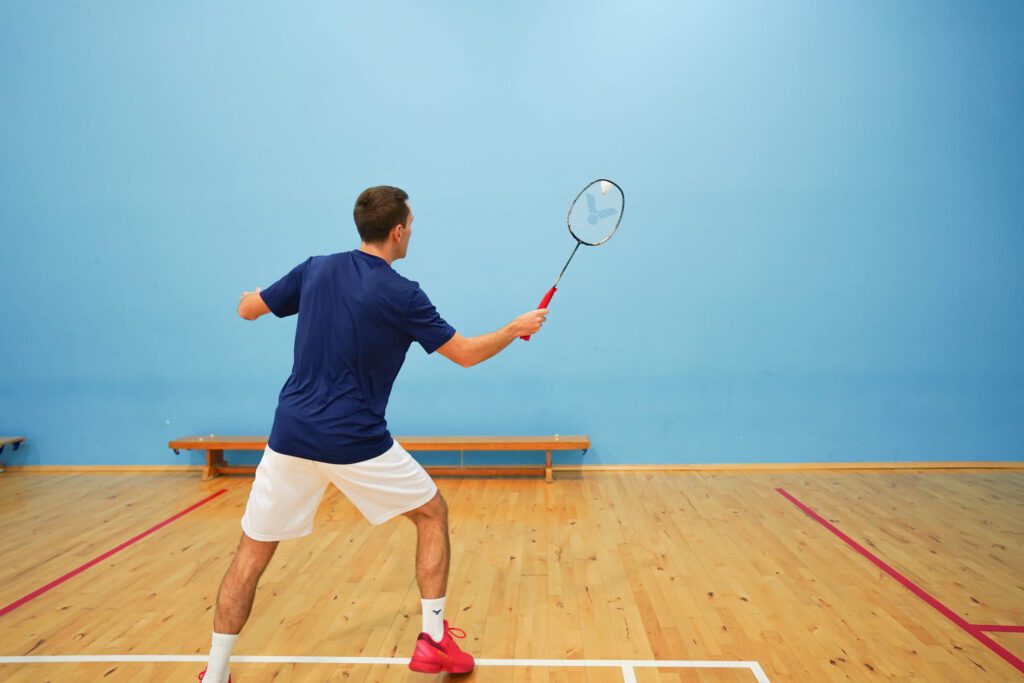
If you don’t have a partner but still want to practice your drives, wall hitting is great, making sure you aim slightly higher up the wall to get into the drive position.
4) Drive rallies using 2 shuttles
Hit drives back and forth with 2 shuttles in play at the same time! This practice is again great for shortening your swing as well as practicing your accuracy under pressure.
5) Doing a 2-shot combination
This practice is more ‘match realistic’. Examples of 2-shot combinations could be doing a smash then drive, or a backhand drive to a forehand drive.
💡 Hitting back to your partner after the first shot helps you understand the time you would have in a game and the necessary adjustments you need to make in your movement!
If you want to practice your drives in more open routines like rear-mid, you can check out our 10 best 1v1 routines here.
Learn More
We hope you’ve now learned how to perfect your forehand drive in badminton. If you’re interested in learning how to play the perfect backhand drive in badminton, you can read the blog here!
Or, you can watch the full YouTube video below of what we have discussed above, which includes visual demonstrations of the explanations and exercises.

