Mastering The Jump Out Smash In Badminton: A Complete Tutorial
The jump out smash (sometimes called the China jump) is a type of smash in badminton where you jump out to intercept the shuttle from a flat lift, before it goes past you. Getting the technique right for the jump out smash is really important.
To play a good jump out smash in badminton, you need to split step, then push off and jump out, keeping your hips parallel to the direction of your split step. Bring your elbow back, open up your chest, rotate your torso, then bring your forearm through and snap your wrist to strike the shuttle.
This article will cover the jump out smash to the forehand side. The jump out smash to your round-the-head (backhand) side is different and more complex, which you can learn about in this article here.
Table of Contents
When Should You Use The Jump Out Smash?
You should use the jump out smash when your opponent has played a flat lift and you don’t have time to get behind the shuttle.
Instead, you jump out to intercept the shuttle before it goes too far past you and you have to take the shuttle late.
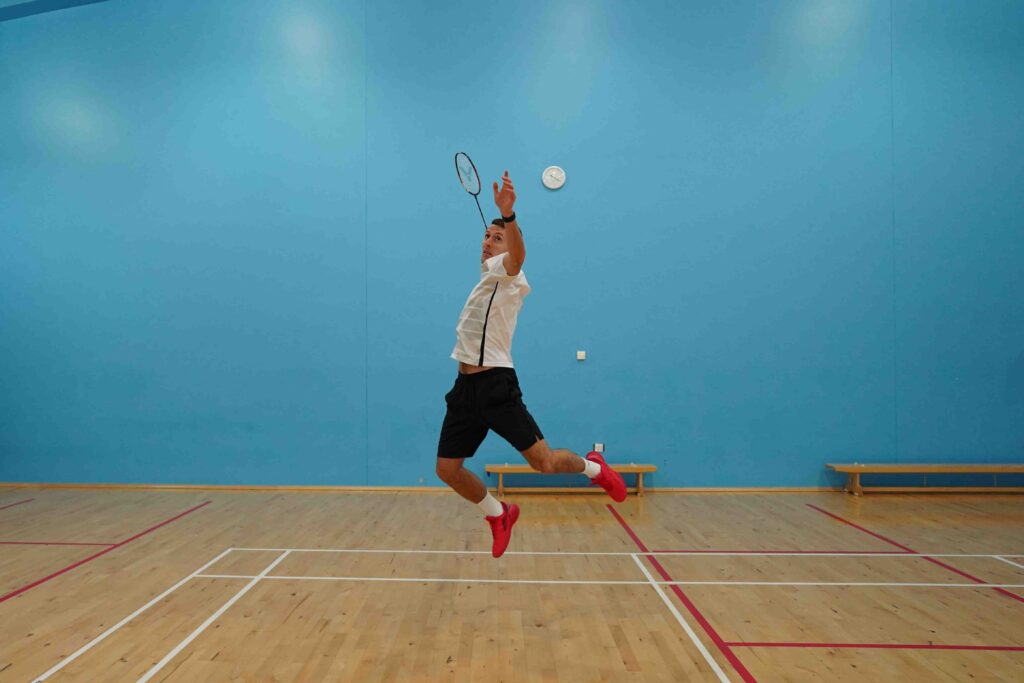
💡 The jump smash and scissor kick smash are used when you have more time and are able to get behind the shuttle, and they have a completely different technique to the jump out smash!
How Do You Get A Stronger Smash In Badminton?
It’s not just about having bigger muscles! You need to improve your technique and timing in order to generate a fast racket head speed at the point of contact, this is the main goal. For more detailed information we’d recommend checking out our complete step-by-step smash tutorial here!
What Is The Correct Footwork For The Jump Out Smash?
Step 1 – Starting Position
You should have your legs just wider than shoulder width apart, and bent. You can’t do an explosive jump if your legs are too narrow, or too straight!
Step 2 – The Split Step
In singles:
- The directional split step is more common as it helps you to jump backwards. This is necessary because your ‘base’ is more towards the middle of the court as you have a bigger area to cover in singles.
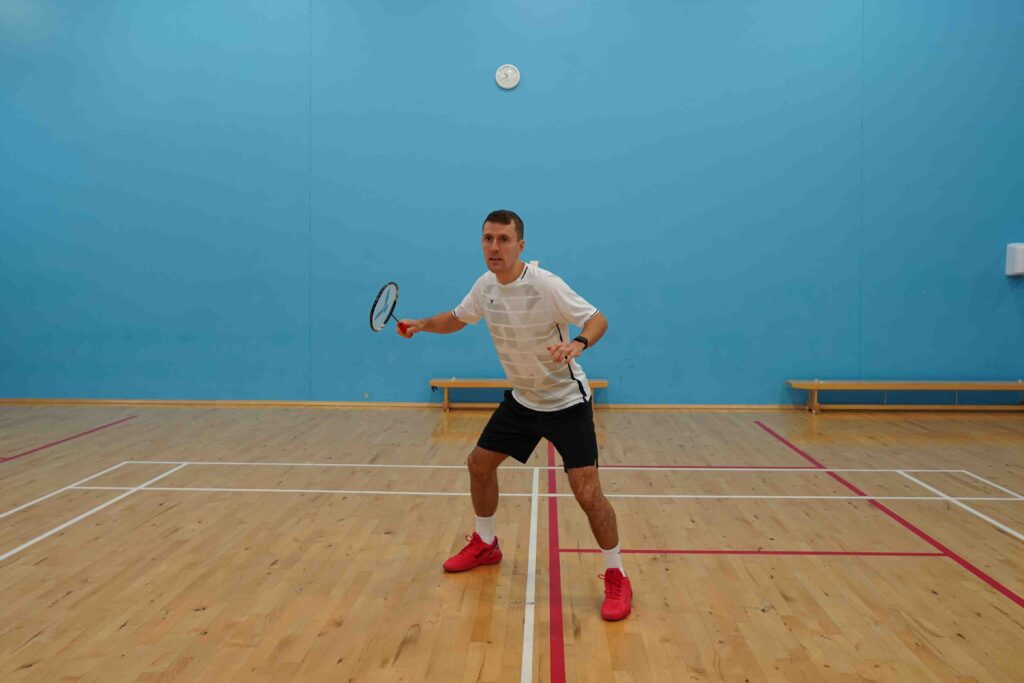
In doubles:
- If you’re the rear-court player in an attacking formation your base would be a bit further back, so your jump is likely to be more sidewards and you would therefore split step with your feet almost side-by-side.
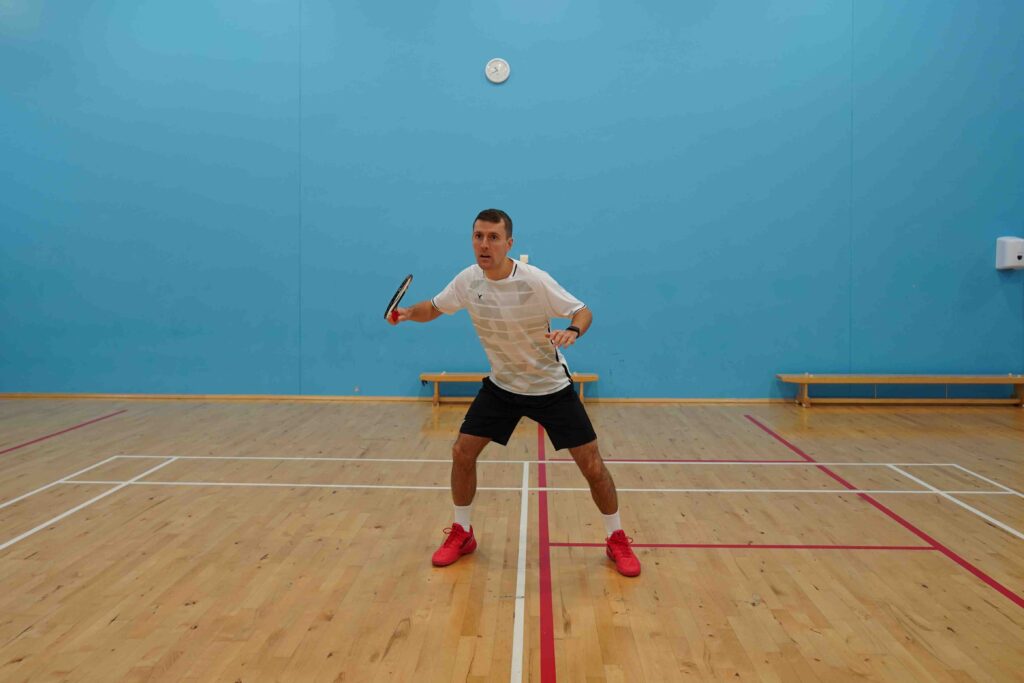
If you want to learn more about the split step in badminton, such as what it is and how to do it, check out this article here.
Step 3 – Getting Into The Right Position
After your split step, you need to look at the shuttle and instantly assess how far away it is. Depending on this answer, there are 2 options:
Option 1 – Simply Jump Straight Away!
- To maximise the power and distance of your jump, you should push off with your non-racket leg first and then your racket leg. This should happen really quickly though, so unless you recorded yourself and slowed it down, it should just look like a normal jump!
Option 2 – When You Are Too Far Away From The Shuttle To Get There In One Jump
- Here you should do an extra chassee step before doing the same jump as in Option 1. This option will be more common for those who are smaller or less explosive.
💡 You can do this ‘jump out smash’ from many different positions on the court, you don’t always have to go from your base position to the corner.
Step 4 – Hitting The Shot
We’ll go through this in much more detail in the next section, so let’s quickly cover the final footwork step first!
Step 5 – Recovery
You ideally want to land with both feet at the same time. Your knees should be bent which not only reduces the impact, but also enables you to push off again straight away and to the next shot.
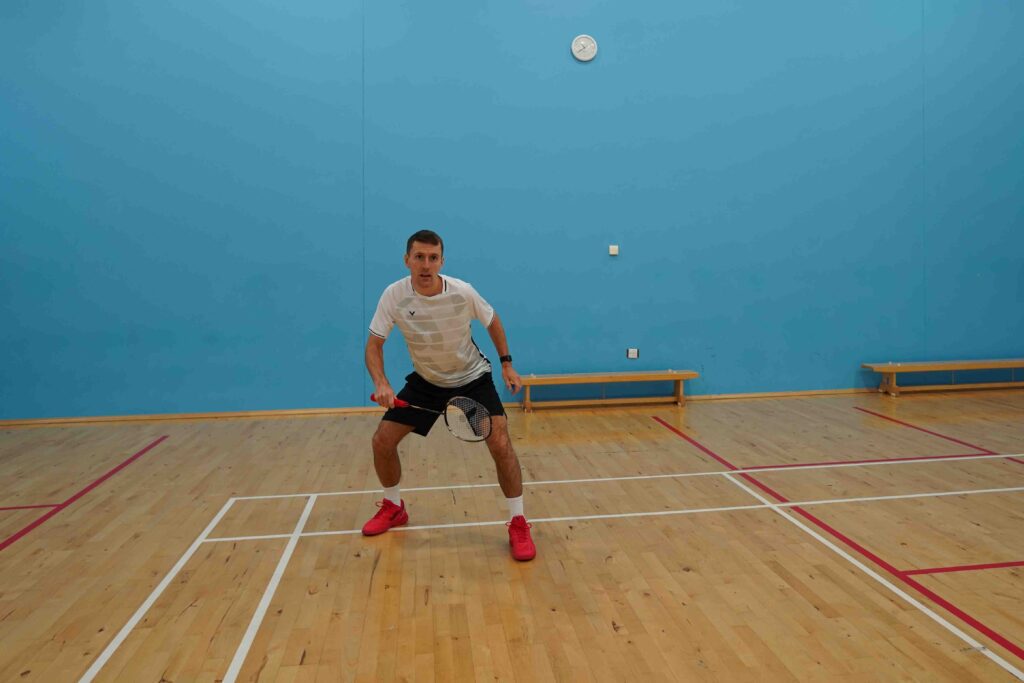
💡 If you’re new to this movement we’d recommend practicing the footwork without a shuttle - to not only get it engrained into your muscle memory but also give you the confidence to know that you can do it, and do it safely in a match.
What Is The Correct Hitting Action For The Jump Out Smash? (4 Steps)
💡 Unlike the jump smash or scissor kick smash where you have time to face sidewards in your preparation, the jump out smash is done from a flat lift where you don’t have time to get behind the shuttle and rotate your whole body into it.
Step 1 – What You Shouldn’t Do
Do not rotate your legs or hips after your initial split step movement. They should remain roughly parallel to the direction of your split step – so for example if you split step side-by-side then you would keep your legs and hips facing predominantly forwards.
Step 2 – Racket Preparation
As you’re about to leave the ground with your jump, you need to prepare your arms by bringing your racket arm up and pulling your elbow back behind your body with it in about a 90-degree angle.
💡 The further you can get your elbow back whilst keeping your hips square, the more distance you have to create a fast racket swing speed.
By doing this you will open up your chest, allowing you to rotate your torso which is important for generating power and especially important for this jump out smash because you can’t have that full body rotation!
You can see here that world number 1 Zheng Siwei’s hips are facing the net, whilst his upper torso is facing sidewards and his elbow is back and ready!
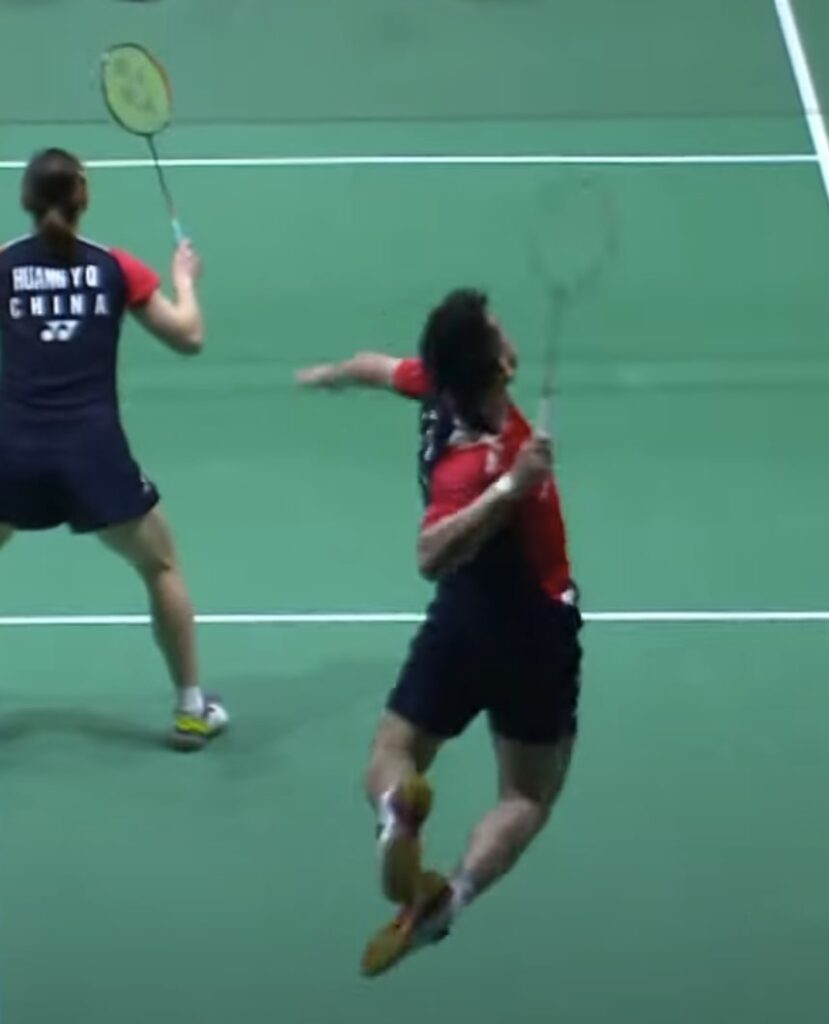
Don’t forget to bring your non-racket arm up in your preparation to help with your timing and balance!
Step 3 – The Fastest Part Of This Shot
Now you rotate your torso and then throw your elbow forwards!
When your elbow is roughly in this 90-degree position, and your hips and torso are facing the net, you bring your forearm through and snap your wrist to strike the shuttle.
It’s important to mention that when we say “snap your wrist” we don’t mean flap it. Your forearm should still remain in a strong position as you hit the shot with force.
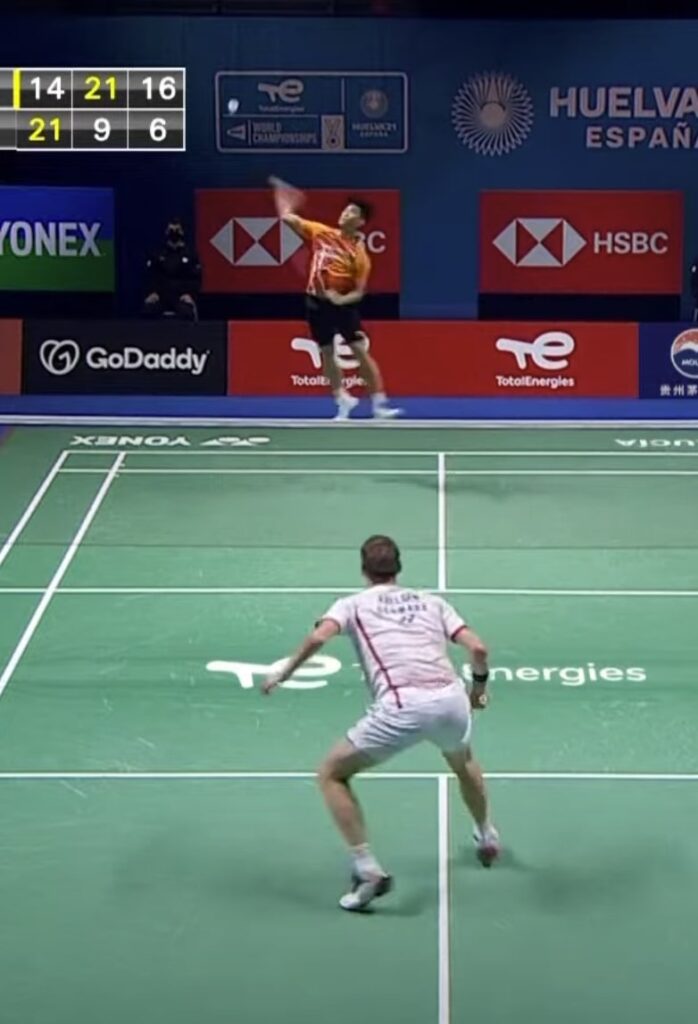
This step is the fastest part of the shot because these small movements should be done VERY quickly after one another!
Although this is fast, it’s important to try and stay as relaxed as possible until the point of contact, which will help you generate a fast racket swing speed, and therefore generate more power.
You’ll also see professionals have their non-racket arm up, then as they strike the shuttle, they pull their non-racket arm closer into their chest.
This is to increase the racket speed and therefore power of the shot, and then as they land they bring it up again to help balance themselves.
To time the jump out smash well you need to be at the fastest part of your swing when you make contact with the shuttle. You also need to have an open racket face upon the point of contact so that you are not slicing the shuttle.
Step 4 – The Follow Through
After you’ve struck the shuttle, you should have a shorter follow-through than if you were doing a jump smash or scissor kick smash and this is because you’re not doing the full body rotation.
If you were to have a big follow-through, it would force you to over-rotate, making you lose control of your smash and your recovery would be significantly worse!
As you’re finishing your follow-through you should be landing, and then following the 5th step of the footwork section, the recovery.
As a reminder, you ideally want to land with both feet at the same time. Your knees should be bent which not only reduces the impact, but also enables you to push off again straight away and to the next shot.
Bonus Tips
- Whilst a high jump isn’t necessary, the higher you can get and the more you almost ‘throw’ your body up, the more threatening you look to your opponents. Plus, you can also get a steeper angle on your smash!
- Because you’re going at maximum speed, don’t expect to be able to recover back into court straight away – this is why your placement is really important and also why you shouldn’t use this smash with full power at the wrong time. In doubles your partner can cover you if you’re really off balance, but you have to play a shot which sets them up.
- Whilst the focus is on the jump out smash in this blog, you can also do a deceptive drop shot or punch clear using the same footwork and technique to keep your opponents guessing.
Learn More
We hope you’ve now learned how to effectively implement the jump out smash into your badminton game and also know when you should or shouldn’t use it!
Otherwise, you can also check out our full YouTube video below on everything we’ve discussed above, which includes more visual explanations and demonstrations of each step.

