The scissor kick (or scissor jump) footwork in badminton is most often used in the round the head corner (or backhand rear court side).
A scissor kick is performed by doing a directional split step, followed by a pivot, before pushing off your racket leg to switch your legs like scissors as you strike the shuttle.
You can use the scissor kick in badminton to be faster to the shuttle, play better shots and therefore win more points, and the following 5 steps will help you do that!
You start with a directional split step with your non-racket leg slightly behind (like the photo below).
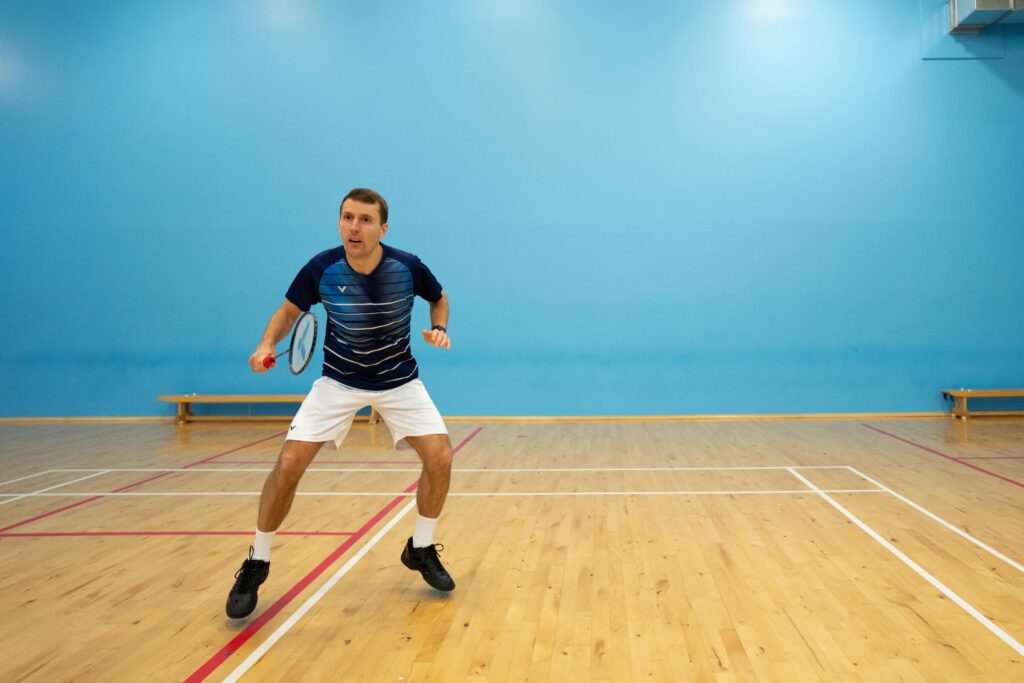
Not doing a split step or doing it too slowly is why we see a lot of people forced to take a backhand, so this is really important to get right!
After the split step, both legs should be bent and you push off your racket leg.
This push off is where you can make extra gains in terms of your movement speed, so try to push off as quickly and explosively as you can.
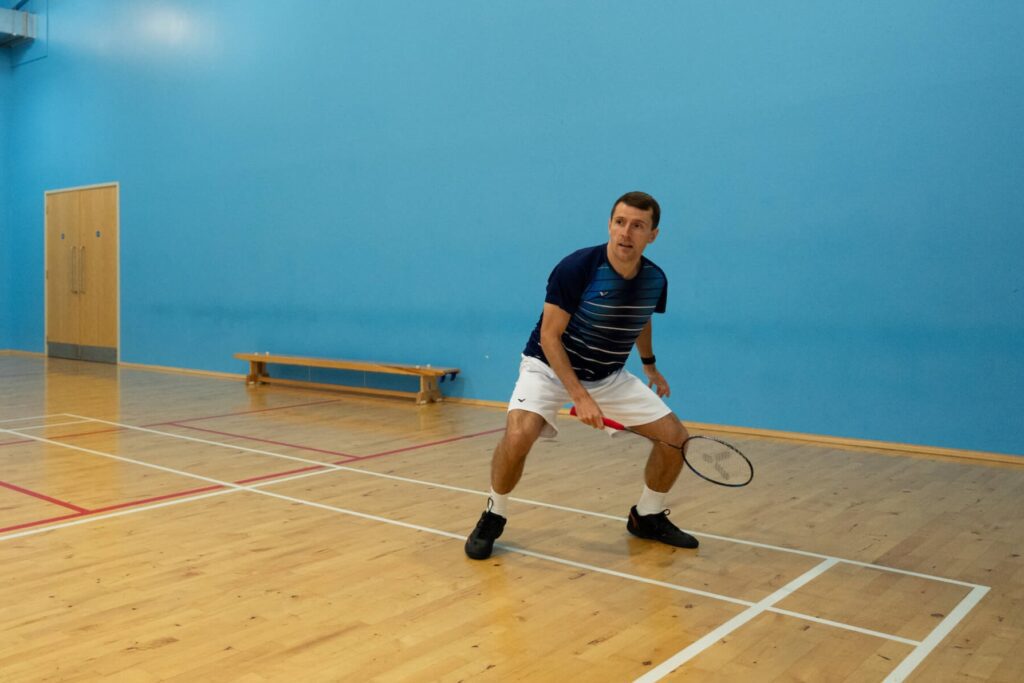
After the push off, you then do a pivot (or mini jump) on your non-racket leg.

This pivot is so important for two reasons:
It helps you change the angle of where your foot is facing so that you can be in a sidewards position which enables you to rotate into the shot.
It helps you make adjustments to exactly where the shuttle is going. If you’re closer to the shuttle then you’d only do a small jump whereas if you’re further away you would do a bigger jump.
If your pivot/mini jump still isn’t helping you move far enough, you can do an extra chasse step afterwards to cover the required distance.
Doing a mini jump helps you create extra distance in your movement, so you’re less likely to need to do an extra chassee. You shouldn’t pivot and just turn on the spot!
Once you’re in a sidewards position after the pivot, you need to perform what’s called a scissor kick movement. It’s called this because you push off your racket leg and your legs switch like scissors!
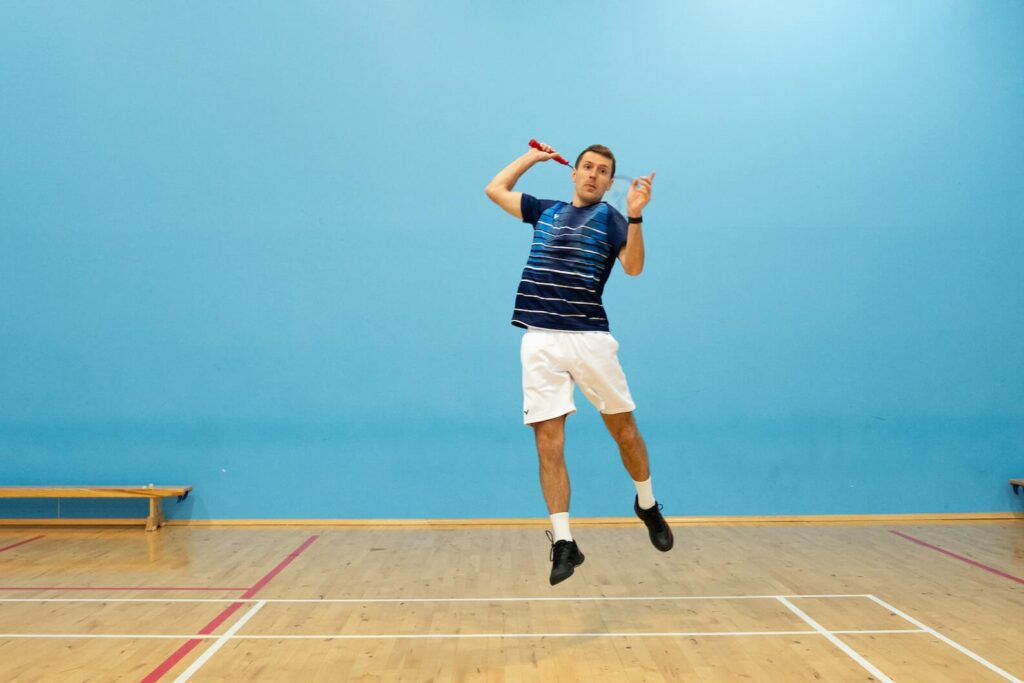
Doing this helps you generate power and control in the shot and also helps you recover faster back into court afterwards since your momentum is going forwards.
But, during this scissor kick movement you SHOULDN’T:
Since we’re only covering the footwork technique, we won’t go into detail on the hitting action as this depends on what shot you are playing.
If you do want to learn more about specific shot techniques, you can check out our library of articles here!
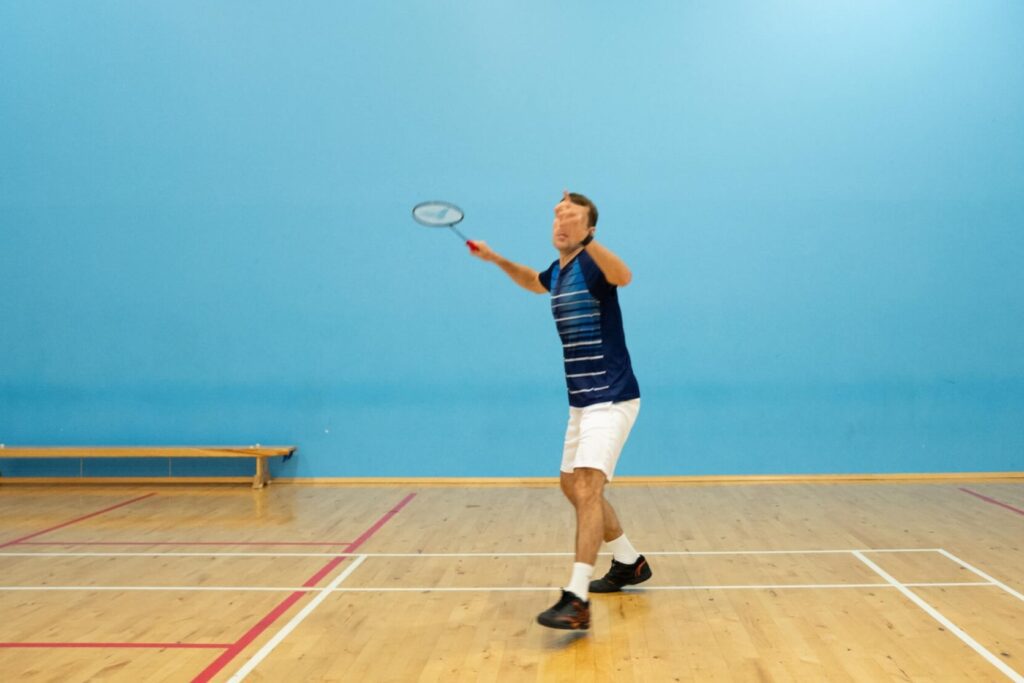
After you’ve hit the shuttle, you should land with your legs slightly wider than shoulder width apart, and bent.
Doing this will help you absorb the landing and remain on-balance when moving at speed, which also helps you recover faster.
It’s also important to land with your feet at a slight sidewards angle. This is because if you have your feet facing forwards, you’re more likely to be off balance and fall back. You’ll then need an extra step to recover!
As soon as you’ve landed, you then push off with your non-racket leg and do one of either two recovery movements – a running step or a chasse.
Which recovery movement you do will depend on what shot you play and how on balance you were when you hit the shot.
For example, if you play a straight smash because you were on balance, you might then anticipate the straight block and move directly there using the running step. Or, if you weren’t quite as on balance and played a drop shot then you might do a chasse step instead back into the centre of the court.
If you do find you’re struggling with your recovery, it might also mean that your core and legs need strengthening. Having a strong core and legs helps to bring your body back into the court, whilst also adding extra power into your shot!
We now have 3 levels of practices to help you master the scissor kick movement:
Though it might sound boring, repeating this movement again and again as a shadow movement is what will really help you get each step engrained into your muscle memory.
Practicing without hitting any shuttles will also allow you to focus on the footwork and break down each step individually. You want to get to a point where you can do this without even thinking!
We would recommend doing 3-5 sets of 6-10 repetitions, where you are just performing the footwork of the scissor-kick movement. Take your time after each movement to see what felt right, and what didn’t!
You might also find it useful to record yourself doing this.
For this practice, you can get someone to high serve to you so you can practice the scissor kick movement on it’s own.
You can then progress to doing a 2 shot pattern by adding in a shot prior to the scissor kick movement.
💡 TOP TIP: Try not to go too slow when adding in the shuttle as you want to start practicing the movement like how you would move in a match. Slowing the movement down should come in the ‘shadow’ stage.
Now that you’ve got the technique down, you can start incorporating the movement into open routines and eventually matches too.
For example, the feeder can be stood in one corner and you as the worker should hit everything back to them as they move you around the court. The feeder should try to hit around one in every four shots to your round the head corner, so you can focus on practicing the scissor kick movement.
We cover lots more 1v1 routine examples in this article here!
The scissor kick footwork is best used when you have time to hit the shuttle, but if the lift is flatter and you have less time, we’d recommend using the jump out footwork instead. We cover this in a lot more detail here!
We also have a full YouTube tutorial with visual demonstrations of each step of the scissor kick, which we’d recommend checking out to further understand this footwork pattern! You can find this below!
Each month we share exclusive insight into becoming a better badminton player, and behind-the-scenes of Badminton Insight.
Join 2400+ people receiving our free Monthly Insight Newsletter!